

When you go out a back door onto our patio, you are in an alley between the house and a wall of rock. On each end is a retaining wall and then the land slopes upward. Its a beautiful and cozy patio with dramatic views. When we moved in, to get from there to the rest of the property you had to either scale a retaining wall or go to the front of the house and around and then very carefully navigate up a slippery hillside to get up to the woods.
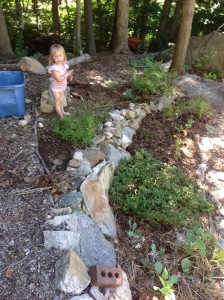
2013. As I mentioned in the first of this series of catch-up posts describing what we’ve done over the past three years, one of our first projects was to hire a stonemason crew to build a set of stone steps from the patio up to the top of the hill and terraces for gardens up the hillside.

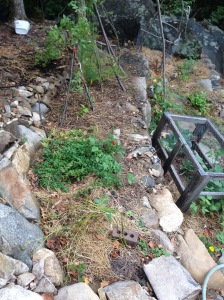
Then we began transforming the terraced area into a garden. This was a very challenging area! On the north side of the house and partly shaded by beech and maple trees above, the area was not a likely spot for a vegetable garden. Poor, sandy, thin soil made its prospects even worse. To top it all off, the construction left the garden beds severely compacted. But I was determined that by selecting the right plants and adopting the best practices, (and with a heck of a lot of work) it would become a beautiful and productive little garden.
We drove to a store and bought about six bags of compost (not without grumbling about having just left two filled 50 gallon compost tumblers at our last home). My son Jordan and I started with a plan to Double Dig the terraces to work it in, but we shortly discovered there were several big rocks which were taking up much of the garden bed in the lowest terrace. We ended up spending many hours digging them out.

After all that digging, we abandoned the Double Digging plan and decided to make a “lasagna garden” instead. We layered cardboard, sticks, kitchen scraps, and leaves, and on top of all that we spread our expensive store-bought compost. It looked beautiful! At least until the next day when we discovered some animals dug it all up in order to get to some of the kitchen scraps. Lesson learned: do not bury fresh kitchen scraps in garden beds here.
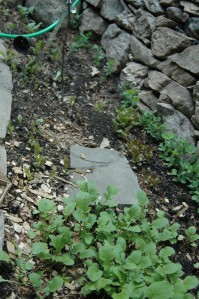
After patching it up, we planted some Winter Savory (Satureja montana) into the lower terrace as well as annuals such as radishes, lettuce, and spinach.
Pregnancy-related nausea and fatigue started to drag me down, so I relied on my family to get the other two terraces prepped.
Chuck and Jordan dug out the largest rocks from the second and third terrace and then I put a thick layer of shredded leaf mulch everywhere and started getting plants in the ground. In the second terrace we planted bok choy, tomatoes, carrots, and other annuals that I had mostly started from seed indoors (with insufficient lighting so they were given a poor start.) We also put in perennials we bought including French Sorrel (Rumex acetosa), Culinary Sage (Salvia officinalis), and two types of Thyme (Thymus vulgaris).
In the third terrace went a nice size Marjoram (Origanum majorana) division from a new friend Monica, who told me it was growing as a perennial in her Westchester garden for several years. Near that we planted Asparagus (Asparagus officinalis) from a local organic nursery. Above the terraces, I planted a Gooseberry bush (Ribes uva-crispa), also from the nursery. On the other side of the stone stairs I built mini terraces and planted strawberries (Fragaria sp.) from Monica.

The perennial herbs settled in nicely, and we had some lettuce, peas, and cherry tomatoes for the season. Much of the greens were lost to slugs or insects or had stunted growth. There was enough to be fun for my son to harvest, but not enough to be worth all the work. It was discouraging to say the least, especially for him. But I tried to take the long-term view knowing that it would take time to build the soil and it would all be worth it, eventually. I was determined to get better results from the terraces and the other garden areas the following year. Even with a newborn baby!
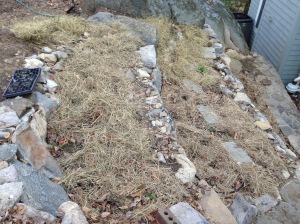
2014. My husband thought it would save time and yield better results if we put soaker hoses on a timer in the garden to reduce our time spent watering manually. So he purchased a kit and we laid out the soaker hoses in all the garden beds. Inspired by a video of Ruth Stout, I ordered a bunch of straw bales and we put down a thick layer of straw mulch on all the garden beds to prevent the soil from drying out before plants could fill in the bare areas.
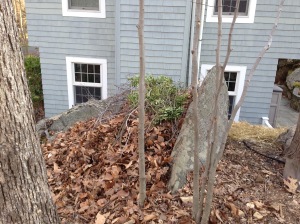
We started another garden bed at the tip of the rock outcropping on the side of the terraces by starting a hugelkultur mound. Hugelkultur is a popular technique in Permaculture. It means “hill growing” and is a way of making a raised bed by piling up wood and covering it with soil. We stacked up some pruned branches, but didn’t have any topsoil to put on top, so we pretty much just had a brush pile for a while. Leaves and kitchen scraps were also added to the pile throughout the season. The idea is the wood will decompose slowly over time and hold in moisture, requiring less watering and sequestering carbon in the soil.
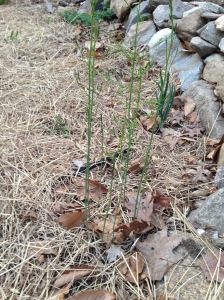
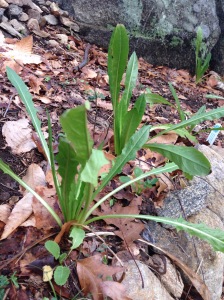
By May we were seeing the first promises of a better year. Young asparagus shoots came up through the mulch. The photo on the right also shows a baby tomato plant near the asparagus. Those are there because I read somewhere that tomato plants repel asparagus beetles, and asparagus repels a tomato-plant killing nematode. I also started growing more asparagus plants from seed to add to this terrace later. I was looking forward to creating a row of greenery across the terrace. Deer supposedly do not care for asparagus (although of course, as everyone says, when hungry enough deer will eat anything.)
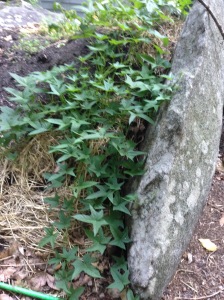
I tossed out some Borage (Borago officinalis) seeds in a small section next to the asparagus. When the Borage flopped over, I dispared that the soil layer was too thin over the boulders. (The following year I learned that Borage always flops over, but I didn’t realize then.) I also planted a Fennel start (Foeniculum vulgare), in the lower terrace, another perennial that’s not a deer fave, and was pleased with how fast it grew.

We did get a few nice strawberries along the steps, but the squirrels were a bit faster than we were. The nooks and crannies method looked cool but made it nearly impossible to use any netting to protect the fruit. Clearly, I needed to adjust my expectations about this area. I had read in some permaculture forums that one should grow an abundance of food so there is plenty for all, including the wildlife. I was skeptical of being able to persuade this poor soil to produce an abundance of anything, but I loved the idea. This was part of my thinking process that led me to change the lawn area into strawberry beds the following year, because a flat area would be easier to protect.
I had cabbages growing in two of the terraces and spent a good bit of time plucking off cabbage worms and washing their eggs away with the hose. Then a Groundhog happened. Darn he was cute–but I was not happy about sharing my cabbages with him because, once again, I did not have that “abundance” of food and my results were so little that I felt very protective of my cabbages. So I used some homemade caging to protect them. But, the caging made it harder for me to keep on top of the cabbage worms. In the end, there was little cabbage to show for the efforts. I think I made about a quart of sauerkraut.
In the fall, I planted my tiny asparagus seedlings throughout the bed and put in a cover crop of oats and peas that were supposed to die back in the winter.
My high expectations were not realized in this second year. With a newborn, of course I had limited quantities of time to make my vision a reality. Still, the garden grew and improved slowly. By September it was clear that I’d have to renew my focus on perennials because annuals needed more time than I could give.
2015. In early Spring 2015 I noticed how some places were still covered with snow, while other places were thawing faster. The thick leaf and straw mulch was keeping the soil from warming up. Of course in the terraces this was amplified by the areas shaded by the house for much of the day. I debated whether to rake back all the mulch, but I was hesitant to destroy the nice worm and insect habitat I’d been working so hard to create. I decided to go ahead and rake the mulch and put it into piles for later reuse so the ground could warm up from the sun. I figured this was the least disruptive process. I noticed that the cover crop peas did not die down during the winter and were growing quite well. I planted a bunch of garden peas, and hoped that all these peas would help boost nitrogen levels and begin a productive season.
In the lower terrace, the Fennel had self-seeded among the Winter Savory and I planted lettuces and chicory and cabbages on the side. I was interested to see what would happen with all the fennel seedlings. But they didn’t do much of anything after growing just a few inches high.
In the middle terrace, I kept hoping that the French Sorrel was going to “spread like a weed” but no new sprouts came up. I seeded Thyme all along the front edge of the rock wall, hoping to create a border that would flow over the edges of the rocks. Only a few of those sprouted. I planted some Minibel tomatoes which were supposed to grow compact in containers, and I thought (incorrectly) they would stay smallish in the garden yet grow a lot of tomatoes. They required staking and grew few tomatoes.
I also put in some cabbages and cucumbers and was happy to see that the previous fall’s Borage self-seeded into the middle terrace. Unfortunately the cucumber plants succumbed to some disease, shriveled up and died.
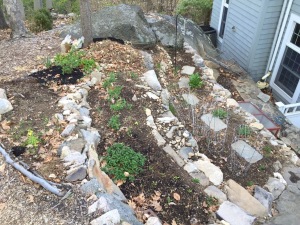
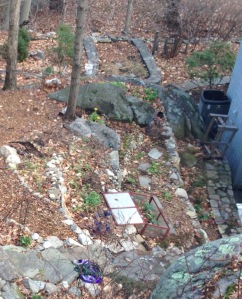
The Marjoram was growing very well. Far better than the Asparagus. So silly me, I moved the Marjoram. Hopefully the teeny Asparagus plants will grow to fill in the space and the Marjoram will survive the move. In the photo you can see that we have created a mini fourth terrace along the top. Some of the Marjoram was moved into that new area, with hopes that it will spread out and fill that row, hopefully creating another psychological barrier to the deer from the luscious bountiful garden that is going to be growing some day in the terraces below!
There are also some cabbages mixed in among the asparagus near the bottom of the photo. There had been lettuces, and then cucumbers that died in that spot earlier in the season.
We bought some topsoil which, among other things, allowed us to finish off the mini hugelkultur bed we had started the year before. I planted a native Narrow-Leafed Mountain Mint (Pycnanthemum tenuifolium) and some Chocolate Mint (Mentha × piperita ‘Chocolate Mint’) moved from the front, as well as stuck tomato pruning into the soil. We got a few tomatoes! Best of all was an old sweet potato from the kitchen that started to sprout in the drawer that was thrown out and grew into a plant. We got a bunch of tiny sweet potatoes from it although they were a pain to dig out of the sticks in the hugelkultur.
Throughout the summer I was listening to a lot of podcasts and reading books about permaculture, edible landscaping, and forest gardening. These persuaded me to stop the Ruth Stout mulching method. I realized that besides working best with a large garden planted out in rows (not at all what I want to do), this method was based on the typical fear/hatred of weeds.
From what I was learning, almost every living plant benefits the soil food web by creating root exudates. Any “weeds” that began to outcompete my desired plants, could be cut off at root level (and preferably, eaten!) until they were outcompeted. Bare soil is bad. It exposes the microbial life to evaporation while also providing no food source. Those microbes are needed by the plants I want to grow because plants’ roots get their nutrients from the microbes who get it from the mineral soil.
I want something growing in every available space. I want a lush, green garden full of fertility and life! So my mission going forward is a low perennial ground cover filling the whole garden. This is sometimes called “green mulch” or “living mulch” and seems to be the optimal way of growing a no-till garden, particularly if the covering plants are nitrogen-fixing (like clover) or have other uses in addition to their main functions of preventing evaporation and feeding the soil microbes. I had also learned that most of edible wild plants have far greater nutrition than cultivated plants. So, I welcomed the Lambsquarters (Chenopodium album), Wood Sorrel (Oxalis stricta), and Dandelion (Taraxacum officinale), that were voluntarily filling the bare soil in the garden and taking on the challenge of helping to convert the poor soil into rich garden soil. I also planted St. John’s Wort (Hypericum perforatum) and native Wild Strawberry (Fragaria virginiana) in the middle terrance as experimental perennial cover crops or green mulch.

This fall was very busy with much of my time for gardening being spent on the front lawn conversion and a project at my community garden, so I only got a few things in for a fall garden. I put in Cabbages and Broccoli (Brassica oleracea) and set up one of my cold frames in the middle terrace. We have some teeny Broccoli growing in the cold frame which we almost had for dinner today.
So this year of terrace gardening ends much like the previous two. Not a lot of results yet, but still a lot of hope and inspiration!
This was the third post in a series of “catchup” posts covering the past three years. I will do one more of these in the Spring to cover the south side of the front yard, but these are so much work and I want to have some good photos of the results to show you. From here, I’m going to get into regular blogging with more frequent, shorter posts about projects I’m doing in the garden as they occur. Through this winter I’ll also write about the more interesting projects from the past as well. I think the super long posts are done for now ! Whew!
Do you have any recommendations for perennial cover crops/ “living mulch” or other techniques you think would work well in this environment? I’d love to hear your thoughts. Please leave a comment below.

Marija – I loved reading your update. We are so excited to start gardening again this spring in our new home, and I’m learning a lot from you. Our new yard is steeply sloped, and has a lot of shade. I want to remove the lawn, and make a full shade/native/no mow back yard, and put most of the fruits/vegetables on the sides of the house where we get sun. I’d love to catch up with you, and hear your ideas on edible shade plants terracing, etc.
LikeLike
Monica, thank you so much for commenting. I love that you are going to remove your lawn, too! I love that you are going to turn your whole back yard into a garden. Let’s definitely get together soon to share ideas.
LikeLike